iPhone Anti-Theft: A 10-Minute Plan Before It Happens and the First 60 Minutes After Loss
Losing an iPhone in 2026 is not just about the cost of the handset. It is about access to your email, banking, identity documents, photos, passwords and, increasingly, your digital keys. Apple has strengthened protection with features such as Find My, Stolen Device Protection and advanced data encryption, but these tools only work if they are configured properly. This guide sets out a clear 10-minute preparation plan before anything goes wrong, followed by a strict timeline for the first hour after theft or loss. The aim is simple: limit damage, protect your money and prevent identity misuse.
Your 10-Minute Preparation Plan Before an Incident
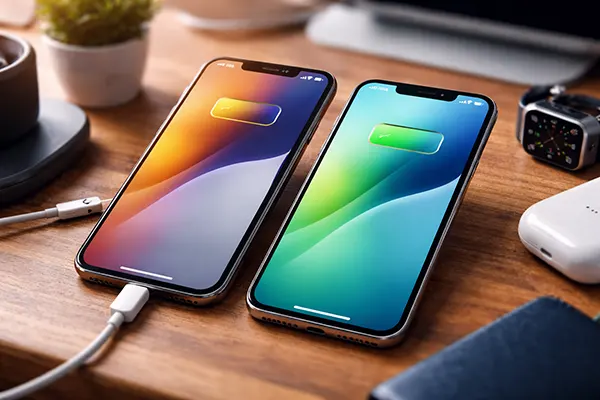
Start with Find My. Go to Settings, tap your name, open Find My and ensure Find My iPhone is enabled. Turn on Find My network and Send Last Location. The Find My network allows your device to be located even when offline by using nearby Apple devices anonymously. Send Last Location ensures that, if the battery is critically low, the iPhone automatically transmits its final known position to Apple’s servers.
Next, review your passcode and biometrics. Use a six-digit code at minimum; ideally switch to a custom alphanumeric passcode. Enable Face ID (or Touch ID on supported models) and ensure it is required for unlocking, Apple Pay and password autofill. In Settings > Face ID & Passcode, enable “Require Attention” for Face ID and set “Erase Data” after 10 failed attempts. This prevents brute-force attempts if someone tries to guess your code.
Finally, configure Stolen Device Protection, introduced in iOS 17.3 and expanded in later updates. This feature adds a security delay and biometric requirement for sensitive actions (such as changing your Apple ID password or disabling Find My) when the iPhone is away from familiar locations like home or work. Also add a Recovery Contact in Settings > Apple ID > Sign-In & Security. Choose someone you trust who can help you regain access to your account if you are locked out.
Lock Screen, SIM and Critical Access Controls
Limit what is visible on the Lock Screen. In Settings > Face ID & Passcode, disable access to Control Centre, USB Accessories and Wallet when locked. This prevents a thief from putting the phone into Airplane Mode or connecting it to external hardware without authentication. Consider disabling Reply with Message and returning missed calls from the Lock Screen.
Protect your SIM and eSIM. Set a SIM PIN through Settings > Mobile Service > SIM PIN. Without it, a thief can move your SIM to another device and intercept SMS-based two-factor authentication codes. If you use eSIM only, confirm with your carrier how to suspend the line remotely and what identification they require from you.
Audit your high-risk apps. Banking, cryptocurrency wallets, password managers and email accounts should require Face ID and not rely solely on being “already logged in”. Remove SMS as the primary two-factor method where possible and switch to authenticator apps or hardware keys. The fewer services tied to your phone number alone, the lower the risk of account takeover.
The First 15 Minutes After Realising Your iPhone Is Missing
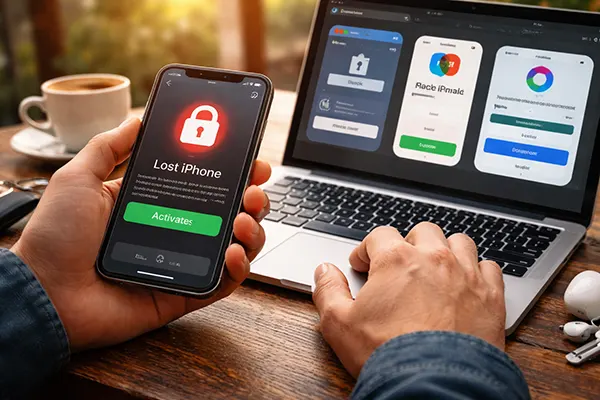
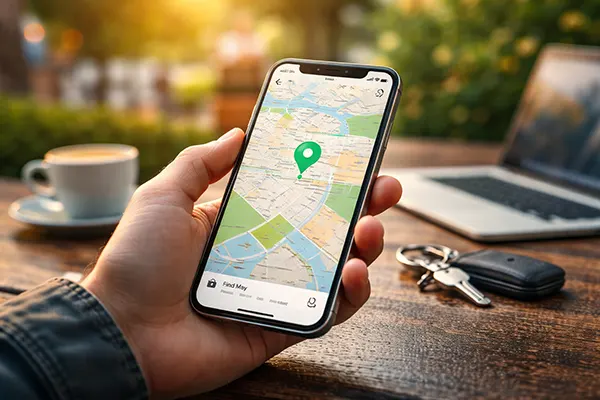
Act immediately from another device. Use a friend’s iPhone, iPad or any browser and go to iCloud.com/find. Log in with your Apple ID and check the device’s location. If it appears nearby, play a sound. If it is clearly lost or stolen, activate Lost Mode at once. This locks the device, disables Apple Pay and displays a custom message with a contact number.
Do not attempt to remotely erase the iPhone straight away unless you are certain recovery is impossible. Erasing removes the ability to track it. Lost Mode keeps the device locked and traceable. With Activation Lock enabled automatically via Find My, the iPhone cannot be reactivated without your Apple ID credentials, even if it is wiped.
Call your mobile carrier and request immediate suspension of your SIM or eSIM. Ask them to block SIM swaps and note the time of the report. This step is critical because criminals often try to reset passwords on financial services using SMS codes. Blocking the number reduces the risk of rapid account compromise.
Securing Accounts and Apple ID Within the First Hour
Change your Apple ID password as soon as possible from a trusted device. This prevents access to iCloud data, backups and stored passwords. Review the list of signed-in devices in your Apple ID account and remove any that you do not recognise. If you had multiple Apple devices, ensure they remain under your control.
Next, prioritise financial services. Change passwords for your primary email account first, as email is often the gateway to resetting other services. Then update passwords for banking apps, digital wallets, PayPal and any service that stores payment details. If your bank offers the option, temporarily freeze cards directly from its app or by calling customer support.
Contact your bank to inform them that your device was lost or stolen. Even though Apple Pay tokens are device-specific and cannot be reused on another handset, proactive notification ensures unusual transactions are flagged. Many banks in the UK and EU can instantly deactivate Apple Pay from their side while keeping your physical card active.
How to Recognise Phishing Messages Claiming Your iPhone Was Found
After reporting a device missing, many users receive SMS or emails stating “Your iPhone has been found” with a link to “verify location”. These are almost always phishing attempts. Apple does not send links asking you to sign in to view the device location. The only legitimate way to check is through the official Find My app or by manually typing iCloud.com into your browser.
Examine the sender carefully. Suspicious messages often come from random numbers or email addresses that do not end in apple.com. They may contain spelling mistakes, urgent language or shortened links. Never enter your Apple ID credentials on a site reached through an unsolicited message. If in doubt, ignore the link and access Find My directly.
Be aware of social engineering calls. A caller may claim to be from Apple Support and request a verification code sent to your number. Apple will not ask for your full passcode, Apple ID password or two-factor authentication codes over the phone. Sharing these allows criminals to remove your device from your account and bypass Activation Lock.
Banking Apps and Apple Pay: What To Do in the First 60 Minutes
Apple Pay is designed with tokenisation, meaning your card number is not stored on the device and cannot be extracted. However, if someone knows your passcode, they may attempt in-person payments before you enable Lost Mode. That is why activating Lost Mode immediately is essential: it suspends Apple Pay on that device.
Open each banking app from a secure device and review recent transactions. Report any unauthorised payments without delay. Under UK regulations and similar frameworks across Europe, rapid reporting increases the likelihood of reimbursement. Many banks provide in-app chat specifically for lost device scenarios.
If you stored digital ID documents, boarding passes or access badges in Wallet, inform relevant providers. Some corporate access systems rely on mobile credentials. Request deactivation and re-issuance where necessary. Within the first hour, your objective is containment: lock the device, secure the phone number, change core passwords and alert financial institutions. Everything else can follow once immediate risks are neutralised.